At this point, you should have your WordPress theme picked out. Remember – it’s always a good idea to search our Theme Finder tool to get an idea of a theme’s performance and reliability before finalizing your decision.
Once you’re happy with your choice, you’re ready to install your WordPress theme and start customizing. We’ll cover both topics in this article, starting with installing your brand spankin’ new WordPress theme.
How to Install a WordPress Theme
To get started, you need to head to your WordPress dashboard. If you don’t already have WordPress installed, hop over to that guide and then come back here.
There are two methods for installing a theme:
- If you’re installing a free theme listed at the wordpress.org theme directory, you can install it directly from your WordPress dashboard.
- If you’re installing a premium theme that you purchased from somewhere else, you’ll need to upload a .zip file of the theme. You should be able to download this .zip file from the website where you purchased your theme.
Don’t worry – we’ll show you detailed guides for both!
How to Install a Free Theme From Your WordPress Dashboard
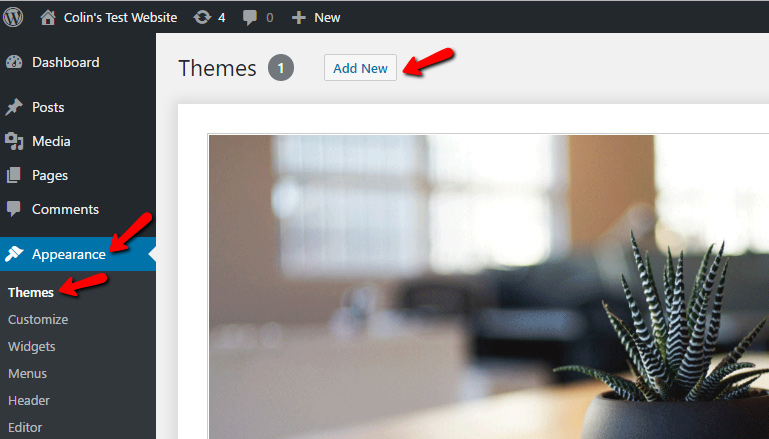
If you want to install a free theme that you found at wordpress.org, you can do everything from your WordPress dashboard. Once you’re logged in to your dashboard, go to Appearance → Themes. Then click Add New:
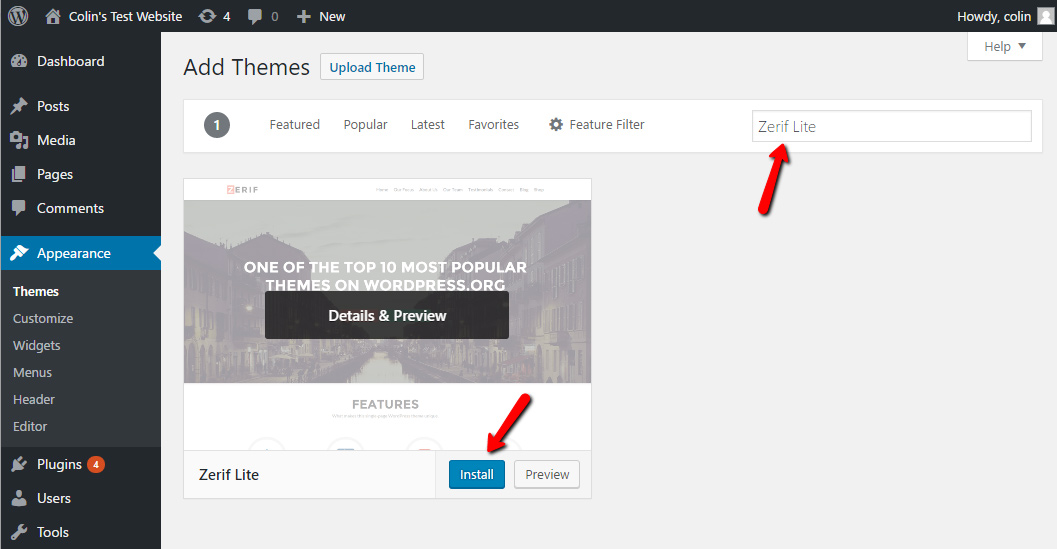
 Then, search for the name of the theme that you found. For example, if you want to install a theme called Zerif Lite, you just need to search for that theme. Then, hover over the theme and click the Install button:
 WordPress will now automatically install the theme. Once it’s installed, you’ll see two options:
- Activate – this activates the theme on your live website.
- Live Preview – this lets you preview what your website will look like with the new theme, without actually making it active.
If this is your first theme, just go ahead and click the Activate button:
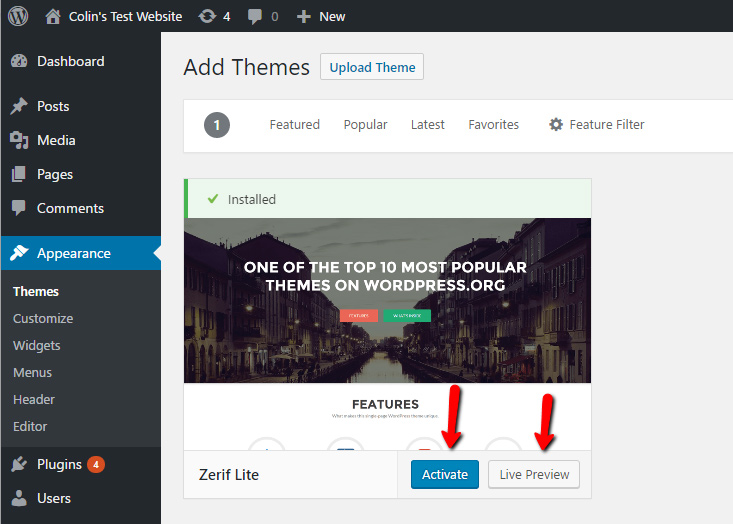 And that’s it. You just installed and activated a free WordPress theme!
How to Install a WordPress Theme From a .zip File
If you purchase a premium theme or download any type of theme from somewhere other than wordpress.org, you’ll need to install it by uploading a .zip file. Don’t worry! It’s still super simple.
Like before, get started by going to Appearance → Themes and clicking Add New:
 Only now, instead of searching for the theme that you want, click the Upload Theme button at the top:
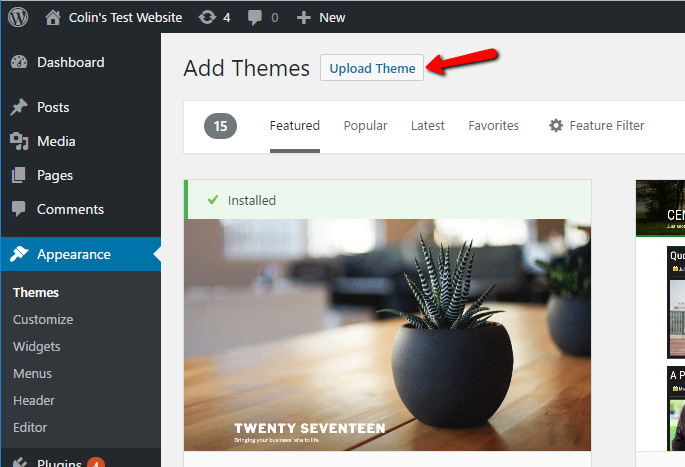 Click the Choose File button and select the .zip file of your theme. Then click Install Now:
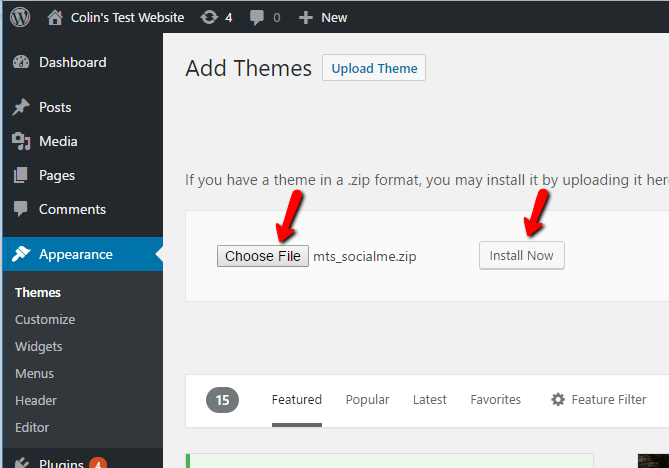 WordPress will automatically install your theme. Then, just like before, you can choose to either immediately Activate it, or view a Live Preview first:
And that’s it! You just installed a premium WordPress theme.
How to Customize Your WordPress Theme
Just like installing a WordPress theme, there are two ways that you can customize your WordPress theme:
- The official WordPress Customizer
- A custom theme options panel
Depending on the exact theme that you chose, you might need to use one or both of these options.
We’ll start with the WordPress Customizer.
How to Use the WordPress Theme Customizer
The WordPress Customizer is great because all of the changes you make are updated in a live preview. To get started with it, head to Appearance → Customize:
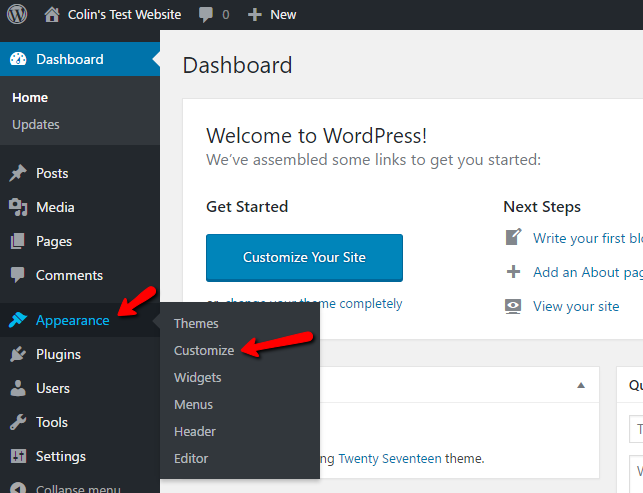 Then, you’ll see a number of customization options combined with a live preview of your site:
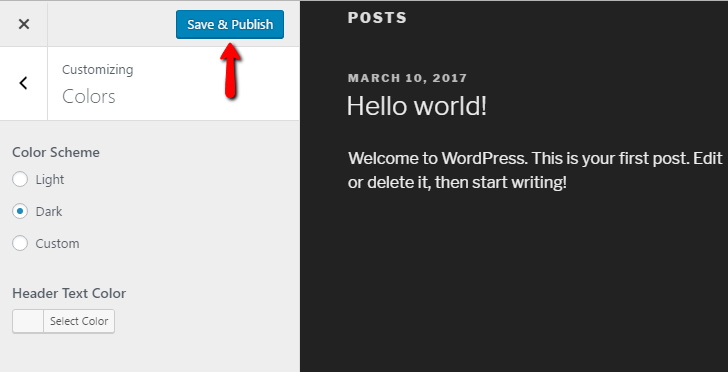
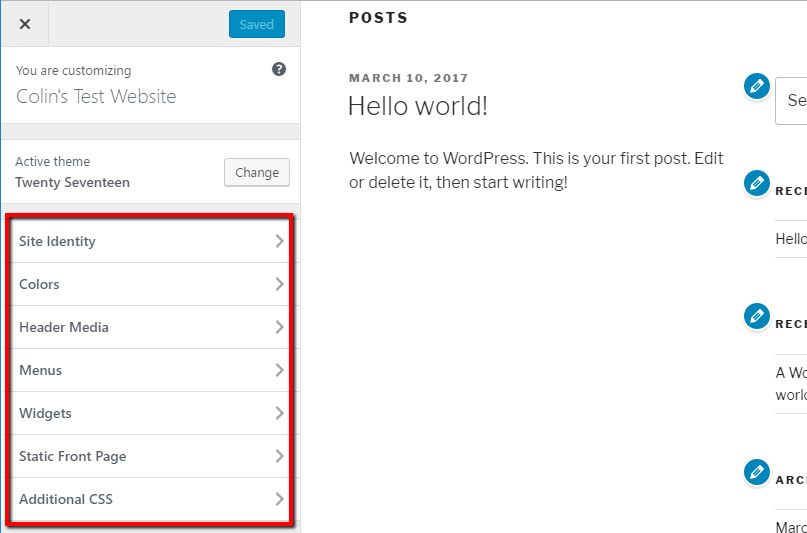 You can browse through these options to customize your theme. For example, if you go to Colors you can change the color scheme to a dark design.
Each WordPress theme has a different set of customization options, so your list might look different than the screenshot. That’s fine!
You can play around with changes and view them in the live preview. Then, whenever you want to publish your changes, just hit the Save & Publish button:
 How to Use the Custom Theme Options Panel
Some themes eschew the WordPress Customizer and use a custom theme options panel instead. For those themes, they’ll usually add a link to your dashboard sidebar.
For example, one premium theme that we have installed on our test site adds a new Theme Options link that you find by going to Appearance → Theme Options.
There, you can customize all aspects of the theme:
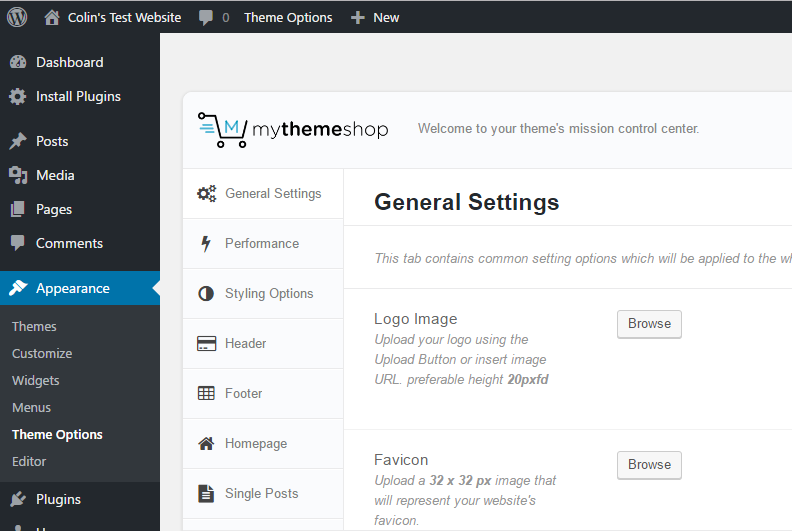 We can’t show you what every single custom theme options panel looks like. But most themes should have documentation that explains how to use it. And you should be able to always find the link to the custom options panel somewhere in your dashboard sidebar.
Making Code Customizations? Use a Child Theme
You can also customize WordPress themes using code. This is perfectly fine. But if you’re going to modify your theme with code, you need to install something called a child theme. A child theme basically separates your custom code modifications from the rest of the theme.
Most premium themes offer a child theme for download alongside the regular theme. You can install it just like you did the parent theme. Then, you’ll be able to make code changes safely.
Child themes are a bit of an advanced topic, so we don’t want to go into too much detail quite yet. Unless you’re adding custom code, you can feel free to ignore child themes for now.
You can read more about child themes in our blog post: How (And Why) to Use WordPress Child Themes
Next, we’ll get into another way to customize the functionality of your WordPress site – plugins. Continue to learn how to install WordPress plugins and some essential WordPress plugins to get you started.


