While there is plenty you can do on WordPress to improve your SEO results, if you’re the kind of person who likes to leave nothing to chance, at some point you might find its default features lacking as far as SEO goes.Now, there’s plenty of third-party search engine optimization solutions which can be used alongside WordPress, but none are as popular as the free Yoast SEO plugin, with over one million users to its name. Needless to say, learning the ins-and-outs of this plugin can pay off in a big way if you can get visitors hooked once they’ve set foot on your site.
That being said, let’s go over the Yoast SEO plugin installation process if you haven’t done that already, and then we’ll teach you how to tweak all of its key settings.
Installing Yoast SEO

Before we move onto the installation process itself, let’s talk a bit about Yoast SEO.
If you’re reading this, you may have already taken the time to tinker with default WordPress settings – things such as choosing the right permalink structure, optimizing your titles (for both posts and media files), picking the right tags, and so on. Yoast SEO essentially takes over the entire process and enables you to tweak these settings in a more intuitive manner, in addition to other powerful options.
On top of that, the plugin includes a content analysis tool, which appears beneath the regular WordPress editor and provides you with instant feedback about your posts. It lets you know whether you’ve forgotten to set a keyword or a meta description, and gives you a Flesch Reading Ease test score, which helps you determine whether your content can be considered accessible or otherwise, among other features.

Installing Yoast SEO is a piece of cake – all you have to do is go to the Plugins > Add New page within your Dashboard, select the Add New option and type Yoast SEO on the search bar on the top right side of the following page. Locate the plugin amongst the results, click on Install Now, and once that’s done, activate the plugin from the installation details page or from your list of installed plugins. That’s it!
Yoast SEO Configuration Options
Now that you’ve completed the installation process, let’s take it from the top and check all of the plugin’s key settings and their configuration options.
General Settings
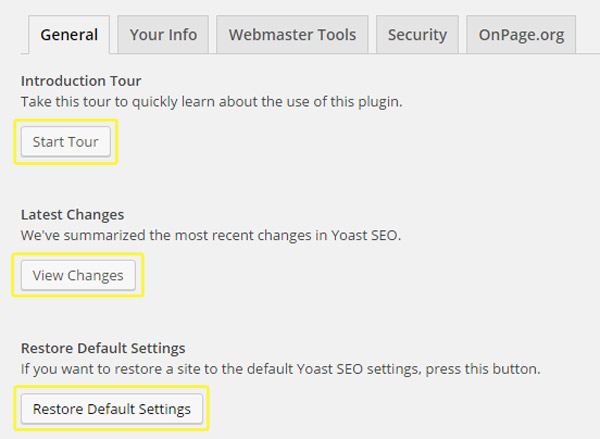
To find this option, click on the newly added SEO option from your Dashboard (the one with the Yoast logo) and you’ll be greeted right away by the plugin’s main screen.
Here you’ll find a helpful Introduction Tour option (in case you’ve already grown tired of us), the plugin’s latest changes, and an option to restore it to its default settings.
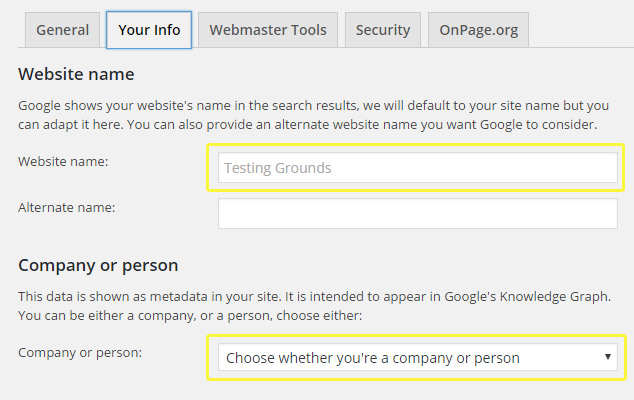
Our interest, however, lays on the rest of the tabs here. So jump over to Your Info. Inside, you’ll be able to modify your site’s name (as will be seen by search engines), and you’ll also be given to option to mark whether you’re a company or an individual, for metadata purposes.
On the next tab, Webmaster Tools, you’ll be able to introduce your ID for a few different tools, such as the Google Search Console. For more information on this topic, check out Yoast’s guide to adding your website to the Google Search Console (which is not the same as having your site indexed!).
Leave the remaining two tabs as they are and let’s move on.
Titles & Metas
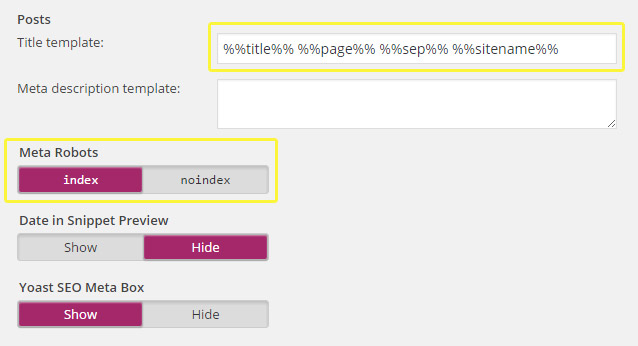
On this page, you’ll be given the option to modify the symbol which your site will use to separate its titles.

As well as change the title templates for your home page using specific variables, individual posts, taxonomies, and your archives. Yoast’s default configuration works fine for all of these, but if necessary, you can choose whether search engines shouldn’t index any specific post types on the Post Types tab.
Social
Here you can add the URLs of all your social media profiles in order for Google to be aware of them. Remember, you don’t necessarily have to create profiles for all the included pages – only those which are truly relevant to your site depending on your content.

XML Sitemaps
We advise that you the general options untouched, as well as the default taxonomy options.
On the Post Types tab, you can choose whether to include your media files in the sitemap, which we wouldn’t recommend. The only tab you might want to modify here is Excluded Posts, where you can add individual post IDs to be left out if you don’t consider them to be relevant.

Advanced Options
Enable the Breadcrumbs option if you think it can help improve your site’s navigation (although a good navigational menu should be all you need in most cases). As far as permalinks go, the default options should serve you well.
Search Console
If you’ve integrated a Google Search Console into your site, you’ll have to enter your Google Authorization code here in order to enable Yoast to get that information.

Post Options
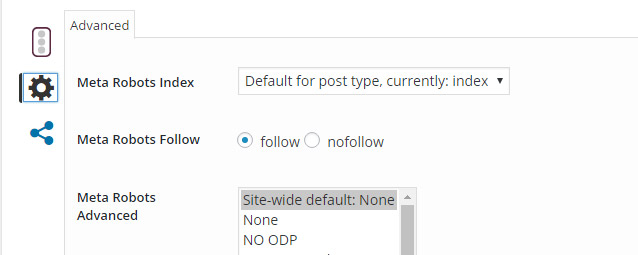
Once you’ve set everything else up, chances are you’ll only have to interact with the plugin through your individual post settings. These include setting your post keyword and modifying how it will appear on search engines.
You can leave the advanced options as they are for now:
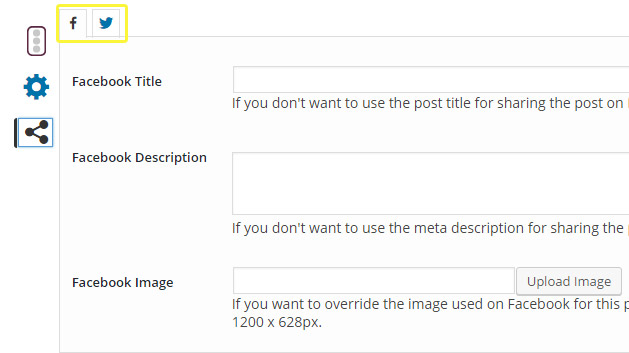
Check out the social media tab for crafting individual post titles, descriptions, and choosing unique images, in case you want to share your post automatically via Facebook and Twitter.
Conclusion
Search engine optimization is a complex field which requires you to keep a lot of factors in mind in order to stay ahead of the curve. The Yoast SEO plugin provides you with the necessary tools in order to tackle this challenge right from your WordPress dashboard, as long as you’re willing to put in a little effort.
In order to make the most of this plugin, you’ll need to go over its settings step by step and configure all of the following sections (we recommend keeping some sort of checklist for this purpose, since there’s quite a few of them):
- General settings.
- Titles & metas.
- Social.
- XML sitemaps.
- Advanced options.
- Search console.
We’ve covered all of Yoast SEO’s key settings above, but if you have any questions or comments, please don’t hesitate to get in touch via the comments section below!


