Successful website owners, developers, and WordPress enthusiasts all have one thing in common (on top of an unhealthy addiction to caffeinated beverages, in our experience) – they always seek out the best available tools in order to maximize their site’s performance.
As far as quality goes, Google always offers solid tools to cover a wide range of fields, and their selection for webmasters is no exception.
Today we will be focusing on just two of their tools – Google Search Console and Google Analytics – as we introduce you to their functions and how to get them working properly alongside your WordPress site.
Google Search Console
Google Search Console was launched in August 2015, replacing the Google Webmaster Tools suite, in order to adapt to a broadening base of customers – not all of whom were seasoned web veterans.
The search console enables you to interact with Google in a myriad of ways, and obtain crucial data to guide your site’s growth. For example, you can use it to check out exactly how your WordPress website appears in Google’s search results, including information regarding metadata or title errors, and non-indexable content.
Let’s find out what else the Google Search Console is capable of by linking our WordPress website with it and then working our way through the setup process. First of all, you’ll want to make your way to the Search Console main page and click on Add a Property.
Add your site’s URL into the box provided, and you’ll be taken to the next step. This requires you to verify your ownership of the site in question in order to successfully link the Search Console to it:
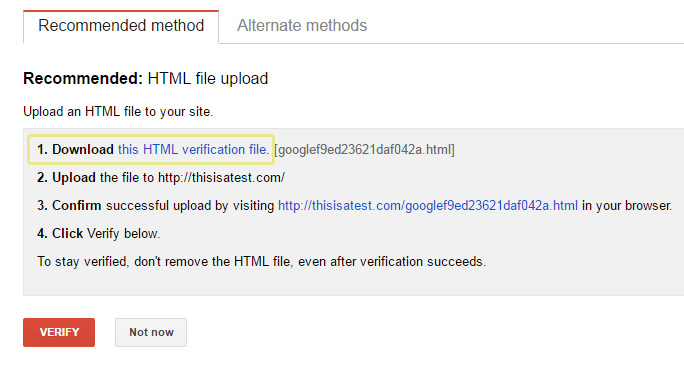
There are multiple ways to verify your ownership, but we’re going to stick with the instructions given under the Recommended method tab, which also happens to be the simplest. Download the HTML file as highlighted in the image above and then upload it to your public_html folder via FTP:
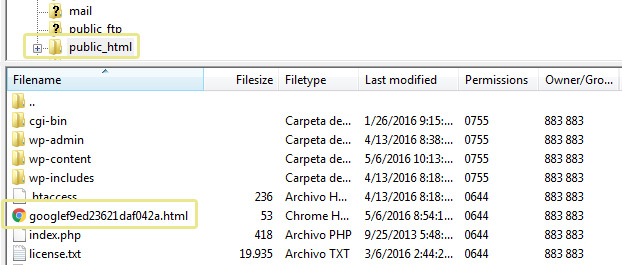
Once you’ve added the file, return to the Recommended method tab, and click on the Verify button at the very bottom. Once your site is verified you will be taken to your very own Google Search Console dashboard. The first screen you’ll see upon arriving will detail the current status of your property including Crawl Errors, Search Analytics, and Sitemaps.
Moving on, the first item you’ll find on the navigation bar to the left (aside from your notifications) is the Search Appearance section. Inside, you’ll find information regarding how to structure your site’s data, highlighting structured data on Google’s search engine results, suggestions for HTML code improvements, and sitelinks:

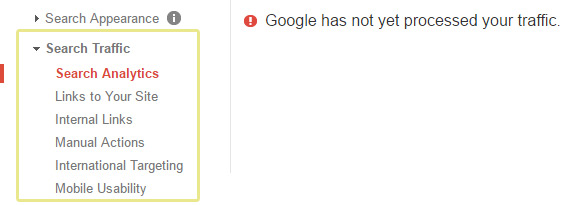
The next section, Search Traffic, is where you’re likely to spend the biggest share of your time. The most important features you’ll find here are Search Analytics (to gauge your performance on Google Search), which sites are linking to yours, and a mobile usability overview. Since we just linked the Search Console to our site, none of these features will have accrued enough data yet to return any information, so you’ll have to check back later:
The third section, Google Index, enables you to monitor how many of your URLs have been indexed, monitor the main keywords in your content, and remove specific URLs from Google’s search results (in case you don’t want visitors to find a specific page due to one reason or another):

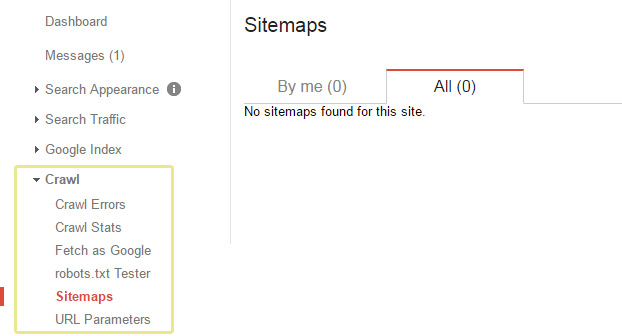
Further down, the Crawl section includes functions for monitoring your crawling stats and any errors found during the process, an option to manually upload your sitemaps to Google, and a useful tool enabling you to check whether Google is able to fetch your site and render it properly:
Finally, there’s a helpful section at the very bottom of your dashboard’s sidebar, where Google has listed a number of additional tools and informational sources under Other Resources.
Google Analytics
While the Google Search Console does offer some analytics information as well, Google Analytics is a far superior choice which will provide you with much more precise data. Let’s go through the sign-up process and check out its features together.
Go to the tool’s main page and click on the Sign-up button, then enter your WordPress site’s information on the subsequent form. You don’t need our help with this part of the process; however, the first page that you’ll see afterward may seem a little bit overwhelming:
![]()
Don’t be intimidated, the WordPress setup process is quite easy. On that page you’ll see a Tracking ID which you’ll require later, so keep the tab open. The next step is to install the Google Analytics plugin on WordPress.
This plugin fulfills one very simple function: it adds some JavaScript code to all of your pages, which in turn enables Google Analytics to track all the data it needs and serve it back to you. In order to finish setting it up, activate the plugin, then go to the Settings tab and click on the Google Analytics option:

Inside, you’ll be asked for your Web Property ID, which is the Tracking ID we mentioned earlier, so go ahead – paste it in the provided field, and click on Save Changes.
When that’s done, your analytics account will be fully configured and ready to collect data from your WordPress website. Head back to the Google Analytics website, and switch tabs from Admin to Reporting, which is where all of your data will be shown:
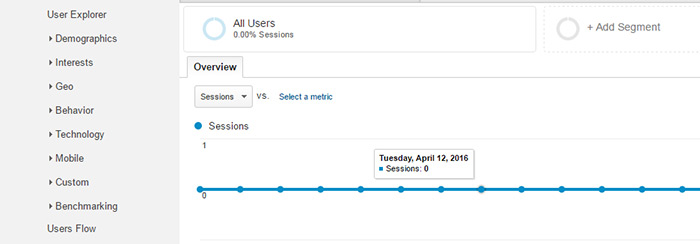
Since there’s so much data you can track using this tool, we won’t have the time to go into details on all of them today. However, there’s a solid introductory section to Analytics that you should take a look at, in Google’s article Get Started with Analytics.
Conclusion
Using both Google Search Console and Google Analytics, you’ll be able to access a whole new level of data, which in turn will provide you with the insights required to fine-tune the development of your WordPress website.
All you have to do in order to access this treasure trove of information is:
- Link your website to Google Search Console.
- Review your search appearance, search results, indexing, and crawling reports.
- Sign up for Google Analytics.
- Install the corresponding plugin on your WordPress site.
- Link your WordPress site and analytics account.
- Review your analytics once enough traffic has been accrued.
Do you have any other ways to monitor your WordPress website? Share your pick with us in the comments section below!


